Wednesday, May 1, 2013

Small Treasures

 Happy Wednesday!  I hope you are all enjoying some Spring weather!  We have a week of amazing weather in the 70's starting tomorrow, and I am SO excited!  

Today I am sharing some of the smaller treasures I've been working on for my space.  I am just in LOVE with fruit baskets lately!  So I rounded up a few and hand painted several of them.  I left the inside of the baskets natural, and roughly painted the outside and bottom.  I wanted them distressed and rustic.


Okay, so it is so hard for me not to keep some of these awesome finds!  I am drooling over these white canisters with the marine blue lettering!  But I won't stay in business long if I hold onto every awesome thing I find!  And it would't be long until my house get's featured on "Hoarders"! ;)
 

I totally scored on these awesome white canisters!

I simply added these chalk board labels and man! are they ever cute!  {yet another item I am dieing to keep}


Now this hand sewn and painted Linen Towel was a little time consuming, but I do love how it turned out!  It's fresh and it's French Farmhouse appeal is everything I was after when I set out to make it!  More styles to come on this.


Another score!  Two are already spoken for! ;)


Okay, now is when you're going to see and understand that I have a serious problem.. I want to keep this too! {Major Hand Slap!}  Isn't it adorable though??  I love how some of the bottom is chipping away and the chrome is still so shiny and polished! 


Well, that sums up some of my awesome finds.. I have much more to post, but didn't want to overwhelm you with a million pictures!  If you are local to the Treasure Valley, I hope you'll stop in and see the space in person. 
It's located at {4906 W. State Street, Boise, Idaho}. 

Store hours are 11am-5pm Tuesday - Saturday.  

Have an awesome Wednesday!


Monday, April 29, 2013

Old End Table, New Look!

Good Morning!  I am excited to share this piece today!  I had so much fun with it and I'm so excited to take it to my new space.. 
So I scored this awesome solid wood end table a couple weeks ago, and I instantly knew that it had  awesome potential!  


Anytime you fine a good wood top, and some nice turned posts, and the right price, GRAB IT!

I came up with a plan for it.  Cream base, distressed, and a nice wood top!  So I sanded the top down really good with 150 grit sand paper.  The next step was to paint the bottom, so if I got any paint on the top, I could just sand it right off! :) 

I mixed up my own homemade chalk paint using water, cornstarch, and wall paint.  This is an awesome way to achieve a similar look to chalk paint and it's extremely affordable!  I found my recipe for this on someones blog the other day, and I can't find it now!  So when I do, I'll post her site for you!  So the recipe is as follows:

For the Paint

1/4 cup water
4 tbs cornstarch
1 1/2 cups paint

Make sure you stir the cornstarch and water together first and really blended.  Then add your paint color of choice!  It's so simple and easy!  You can find my recipe for the stain here.  Just an FYI, I left my vinegar mixture in the jar for a couple months, and the finish came out much darker!  So if you want the lighter greys and browns, give it just a couple days to sit.  If you're after the darker stain like you see below, give it a couple months! 


I had distressed the legs on this table.. I wanted to give it a rustic chic look.  

 I am really happy with how it turned out!  I hope you'll give these paint and stain recipes a try!  It's so handy to have under the sink, just waiting for your future projects.. Have a great day!


Sunday, April 28, 2013

A New Adventure!

Hello Friends!  I am so excited to announce my newest adventure!  I recently rented a space at Enchanting Objects.  This awesome place features old and new home decor, furniture with French Farmhouse flair, vintage and rustic antiques.  It's just a fun place to shop and spend time.  I feel so blessed to get a space of my own here!  

So I took some pictures of my future space to show a before.  There are still some items sitting around in there that will be removed once I come in.  I can't wait to show you all the cool stuff I've been working on to fill this space!


 I just LOVE these floors!  Well, the front part!  The old barn wood is so pretty and rustic.


 I am making my own curtains for this space.. a white cotton with a rope tie.. I can't wait to get them in here!


There is quite a bit of display shelving!


I see so much potential with this space!  I should be moving in this week!


Stay tuned for all the pictures to come of different pieces and items that will be for sale.  And the afters of this space!  Have a happy Sunday!

Friday, April 19, 2013

Dated Mirror Turned Rustic Chic

Hello Friends!  I just restored this older mirror!  It started out as a golden oak, and looked pretty dated.


 With a fresh coat of creamy Chalk Paint, and some minor distressing, it has a brand new look!


I have several furniture pieces that I'm working on right now.  So more furniture posts coming soon!  Have a great weekend!

Linking up to Miss Mustard Seed


Tuesday, April 9, 2013

My Garden

Hello Friends!  So my hubby and I have been working away on our new garden, and man is it a lot of work!  But we are loving every minute of it and are so super excited to plant in a few more weeks!

So the garden started with my measuring the space and then doing up a design on a cabinetry design cad I work with.  The options of this program are endless, so it was really fun to play around with my space and be able to do a virtual walk through before we got started.

Here is my plan evolving into reality!


We built three beds {6' x 5'}, and one bed is {5' x 3'}.  The last one that runs along the side of the house is {2' x 22'}.  I plan to do some vertical growing in the long one up the side of the house, along with some strawberries.


 Step two was to begin the rototilling process!  Although I am pictured here, rototilling, my hubby Brock did most of it!  He was quite fast with it, and since we were on a rental time of one hour, I let him take the reins on this part.


Oh!  Below is a picture of me trying to pull the machine backwards.. with it still in drive.. I forgot to put it in reverse.. soooo.. I went nowhere!
   

 We laid Weed Barrier down on the whole side yard to keep as many weeds out as possible!  We are still brainstorming what to put down for our pathways.. Have any ideas?  Something pretty and affordable!


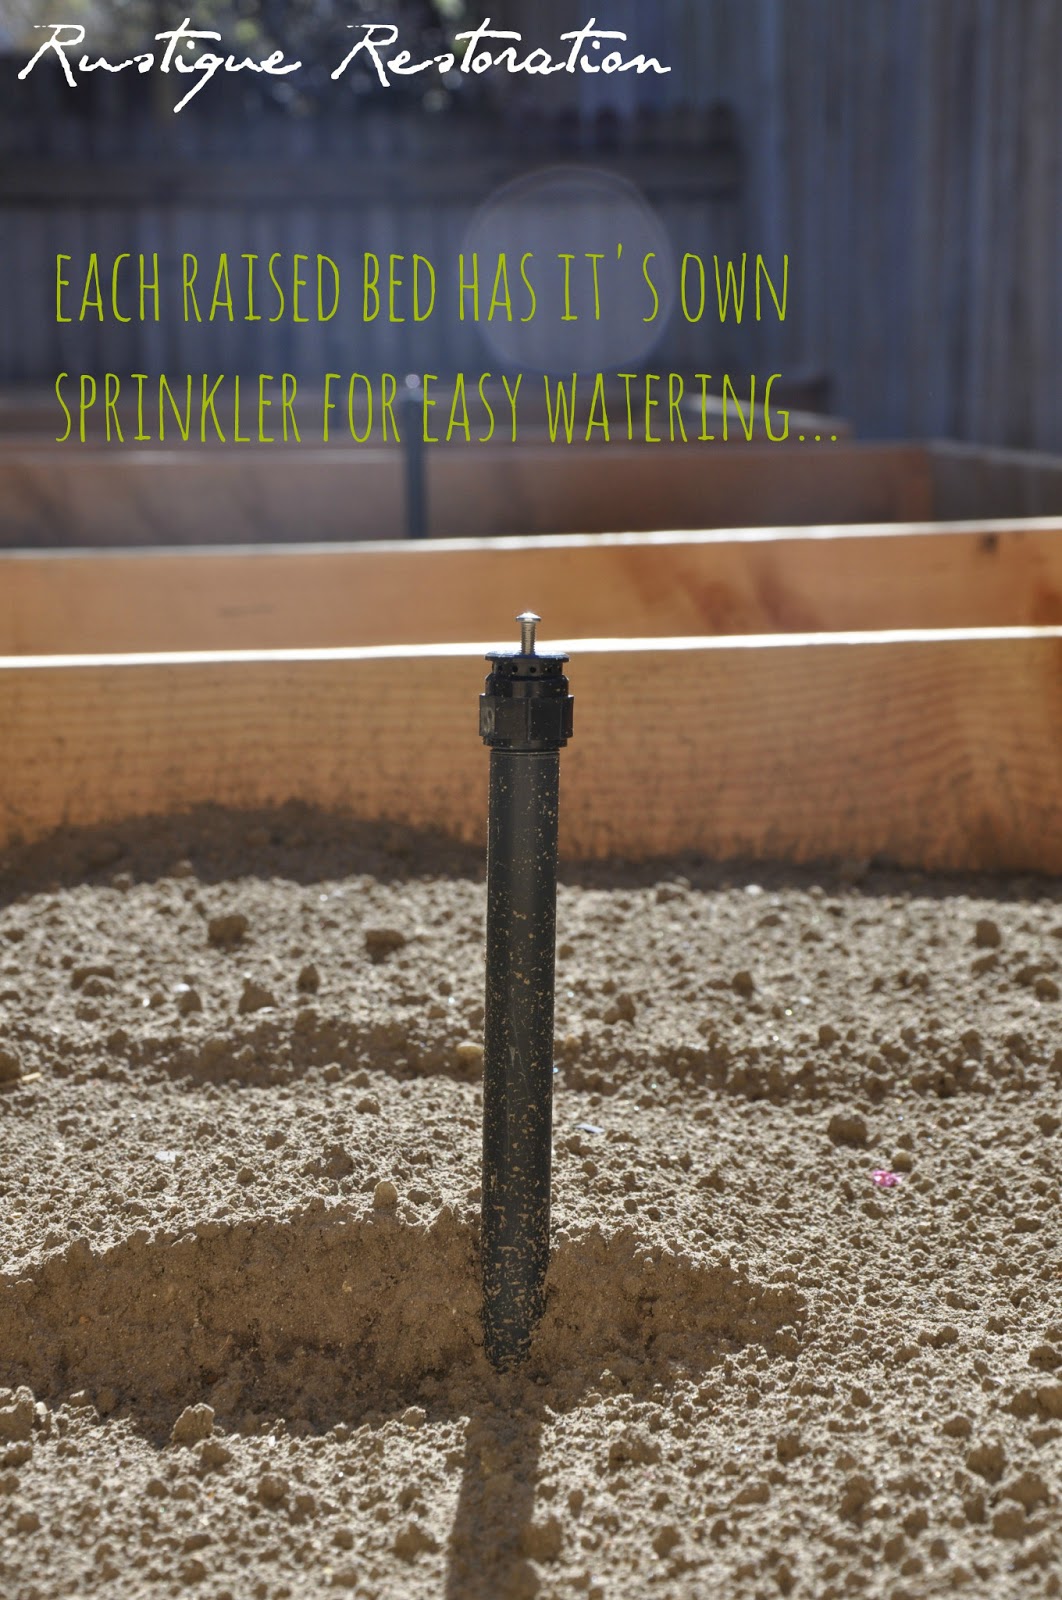
 Brock dug trenches under the ground and installed sprinklers to come up out of each bed.  So the garden will be watered on the same sprinkler system as the rest of our yard.  This makes for easy watering and no worries when we go out of town during the Summer!


My hubby built me this cute little garden gate with a spring loaded hinge on it!  Isn't it cute?  I love it!
He found the short fence up at an old mine he used to work at.  So a little bit of history was added to my garden :)

We filled the beds up with a rich screened Top Soil.  We still need to blend in a good Compost Mix to enrich it a bit more.

Up close of our Sprinklers...


I snapped a picture of our beautiful plum tree while it's in blossom!  It only last for about a week and a half!  The wind always sweeps in and blows the flowers away. :(

I just LOVE Spring time!  I can't wait for the warmer weather so I can start planting!  Are you working on a garden too?  I would love any advice on keeping it healthy and some pathway ideas!  Have a great week!

Wednesday, April 3, 2013

Miss Molly

I would LOVE to introduce the newest little edition to our family!  Meet Miss Molly :)


We just picked her up last night and we are just so in love!  She did wonderful through the night until about 4 am!  She was hungry, needed to potty, and wanted to PLAY!  And because I'm in love with her, I had to play for a bit.  But I've got to tell ya, I'm feeling like the mommy of a newborn baby right now.. just drained.. :)  But she's worth it!

Have a great day!


Sunday, March 24, 2013

An Easter Inspired Ferris Wheel

Hello friends!  Today I am sharing my revamped Easter Ferris Wheel.  


I found this pastel colored Ferris Wheel at Joann Fabrics on clearance a couple weeks ago.  Knowing that these certain pastels are not present in my house, I immediately had a plan for this piece.  I decided to spray it with a Copper Finish Rustoleum that I had in my garage.  I then hit it with some black acrylic paint, leaving some of the copper showing through to give it an aged look.  


I filled the egg holders with different colors and sizes of sparkling glittered eggs.  


You could really do so much with this piece.  Maybe have the copper and then paint it with a grass green or a blue to have a pop of color and display white eggs or something.. I can see myself changing this piece up every year.  It was fast and fun and I'm really enjoying it!  

Are you working on any Easter projects right now?  I'd love to see or hear about them!  Have a great week!