Thursday, October 30, 2014

One Room Challenge - Week 5

 WOW!  I can not believe we are already at the end of week FIVE!! Where has the time gone?!  I tell you what, I am going to have one busy week ahead of me.  There has been a lot of progress made, but there are still a lot of things on the list that need to be done! 

In case you missed the last several posts, here are the links so you can catch up.


Week 4 - Sorry, I missed this one! :-/

Okay, let's move onto what I accomplished over the past couple weeks.  I have two end tables built and one stained and finished.  The other one just needs to be stained.  I LOVE how these tables turned out.  I was originally going to do a more square looking one from one of Ana Whites Plans, but I decided to draft up my own idea.  I love the slanted legs and planked bottom and top.  I stained this table with one coat of Weather Oak, by Minwax, and then one coat of Provencial, by Minwax, over top of the W.O. stain.  You have to do the stains in order if you want to achieve this look.  Provencial is actually a pretty chocolatey brown if you use it first.  I sealed the table with Deft, in spray can form, in Satin.  This stuff rocks!  And it dries SO SUPER fast!  Which works great for me!

  
Seems like I've always got a photo bomber!  That is our Boston Terrier, Sadie.  :)


You can probably see the base area and that it still needs some work.  That is part of the foundation and it pops into the room about 4 1/2".  I am going to paint and trim that out this week.  It will be much more polished when I'm done with it!

Okay, next we have the bookshelves!  These play a HUGE part of my living room makeover. As you can see, there is still lot's to do on these!  I will be planking the backs today, and getting them painted up to match the top of the mantle.  I cut the mantle out of the picture because I've already started to stage it!  Didn't want to expose too much yet!  But I have to say, I am in love.  I know these shelves will rock when they are done too. 


 We pocket holed everything together, including the shelves.  I love my Kreg Jig.  Everything is so much sturdier. 


 After our plywood boxes were built, we cut our face frame pieces and glued and nailed them into place.  A face frame makes a HUGE difference.


I honestly cannot wait to show you the big reveal next week!  It's going to be so great to have this room done.  Below is my list of what needs to be finished and purchased by next Thursday!

The List


Horizontal Planks installed behind shelves
Base molding attached to shelves
Shelves Painted
Wood tops, installed and stained
Second end table stained and finished
Wiring for new light/fan, and installed
Build new console table for entry way
Finish the foundation molding
Fix Brick that is falling apart
Accessorize

Wow, okay, that was more than I even realized!  I better get to work! haha!  Be sure to check out all the other One Room Challenge linking participants at Calling It Home here!  There are a lot of really cool projects close to completion!  Thank you as always for stopping by!

xo Jen

Monday, October 20, 2014

A little French Country Flair, and some Silhouette Action!

Well hello Monday!  Gosh, seems like Monday always comes quick doesn't it?  Guess it's back to work for most people.  I didn't work much over the weekend, however, I did squeeze in a little time to make some pillow covers!  I had a blast with these.. They were fairly easy to make and I am in love with both styles.

First is my French Country Floral Pillow Cover.  It comes in two sizes, 16x16 and 18x18.


 Here are the two different sizes.. the one on the right is just a couple inches larger.
 They are sewn with the envelope enclosure.


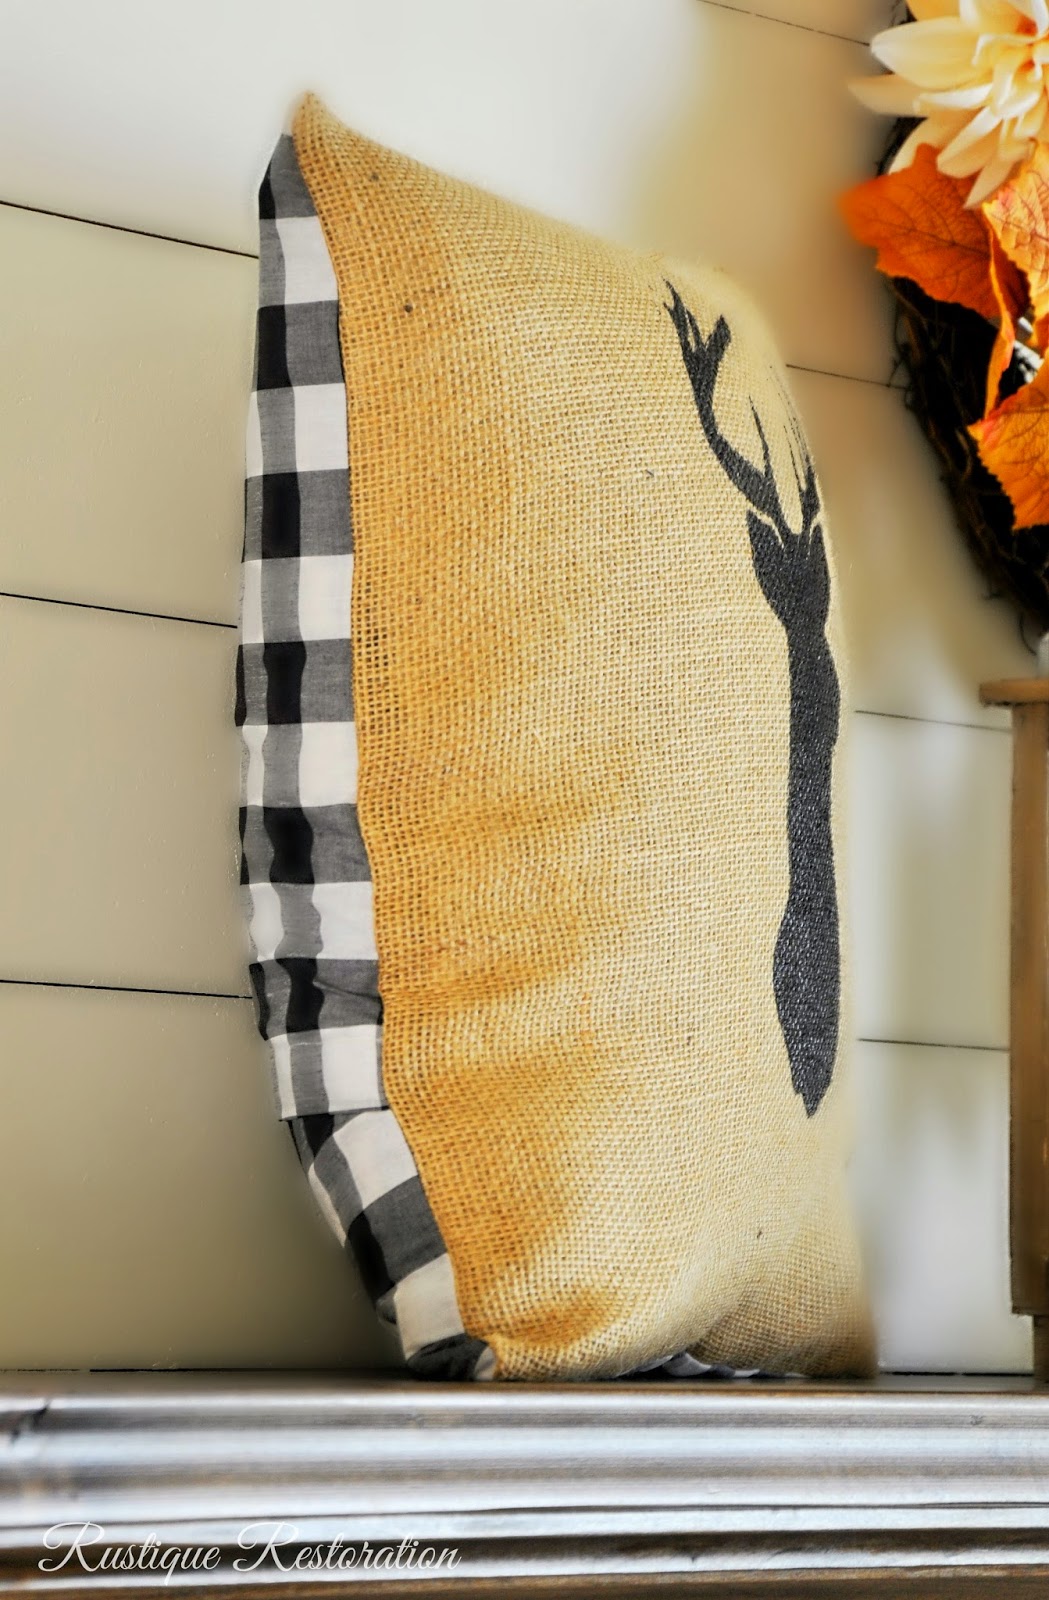
Next up is a Deer Silhouette Pillow Cover on Burlap and Black and White Checks.  I hand drew and painted the Silhouette on using black fabric paint.  This pillow is 16x16, and also features the envelope enclosure.


Both pillow covers can be found in my Etsy Shop!

As always, thank you for stopping by and comments are always welcome and appreciated!!  Have a great day!

xo Jen

Linking up at:

Thursday, October 16, 2014

ONE ROOM CHALLENGE - WEEK 3


Wow, I can't believe we already on Week 3 of the One Room Challenge!  Time seems to be passing very quickly! ;)  But I still think this is an absolute blast!  I can't say enough how great it was to receive all the sweet comments and encouragement.  Thank you!  I need it!

For those of you who are just starting to follow along, I'll clue you in on the challenge!  Linda with Calling it Home is hosting the One Room Challenge, where 20 designer/bloggers are sharing their renovations over a span of six weeks, start to finish!  And Linda has opened up a linking event for all of us who would like to follow along and join the challenge!  So two weeks ago, I shared my before pictures and what my plan was.  Click here to see the post and inspiration pictures.  Last week I shared my progress, and you can click here to see that post!

This past week, the following was accomplished:

Molding was nailed onto the planking to frame it in and give it a more finished look.

  
Next, I filled all the nail holes, and calked the seams where the molding met the planks, as well as the seams where the molding met the walls and ceiling.  Much better!  I gave it three coats of paint, using Vintage by Valspar.  I get that at Lowes, and I used a semi-gloss.  I can't believe how different it looks since I painted it!  It's fresh and very cottage-farmhouse!


Here's a shot of the whole wall.  Miss Molly photo bombed on the left!  Isn't she sweet though!?  I feel like this room is already coming together, and I have so much more to do!
 

I also built my two side tables over the past couple days.  I still need to sand and stain them, but they are built!  And they are HEAVY! ;)  I will be doing a DIY on these tables after the big reveal in a few weeks!


What's on the schedule for next week (if all goes according to plan!):

*Sand, Stain, and Lacquer Side Tables
*Build Bottom Columns Below Mantle and Paint
*Start Building Bookshelves

So wish me luck everyone!  I'm having a blast with this and honestly just get plain giddy when I think of the end result!  I have walked in and out of my living room staring down my fireplace several times today!  Can't wait to see what I can accomplish by next week!  Thank you so much for visiting me today and all the encouragement!  I just love it!

xo Jen

Be sure to check out the others that are working hard on this challenge!  You can find links to their posts here!  Thanks!


Thursday, October 9, 2014

One Room Challenge - Week 2 - Progress

Well, the work has officially began!  And I honestly can't even believe it's actually happening.  I have wanted to do this for so long!!!  We gathered materials over the last several days and yesterday we took the plunge.. There's no going back now!

First I cleaned everything off the mantle and fireplace, and gave it a good vacuum.


Then we attached plywood strips on the brick, using a masonry drill bit and mason screws. This had to go up so we could nail on the planks.
We started at the bottom and worked our way up.

 I thought the top part was going to be really tricky, but it wasn't too hard to figure out the angle.


 We planked the sides as well.  The front will get a trip piece on the sides and at the top, that may get done today.  


The next step is to come up with a plan for the bottom.  I am kind of designing that part as I go.  So check back next week to see what we have added!!  Thank you for following along, and be sure to check out all the other cool One Room Challengers!  You can find them here!

Wednesday, October 8, 2014

Crate&Barrel's Paloma II Dining Table with a Twist

Hello Friends!

My version of Crate&Barrel's Paloma II table is finished and my client finally getting to enjoy it!


I wrapped the bases with Douglas Fir, which were ripped down on the table saw.  I cut 96 pieces of both the long and the short strips.  They had to be individually stained.  This part was quite the process.. But it turned out great!  And it was pretty fun watching it all come together.

The self edge is crafted out of White Limba.  Such a unique grain to this wood.  I had a blast working with it. 


 The top is made out of a gorgeous Hickory.  Doesn't look like your normal Hickory right?  Well, did you know that for every cut of wood, there are two sides to choose from?  The grain is different depending on how you cut.  So my client chose this really unique, and I think exotic looking side.

I stained the top in Natural, and then a coat of Weathered Oak.  The self edge was given a coat of Honey, and then the Weathered Oak. The table was sealed using Polyurethane Wipe On by Minwax.


I am IN LOVE with the chairs my client picked out to go with this table.  They are a rustic microfiber suede, and I love the nail head trim!  So rustic, yet elegant.


The light fixture really suits this new table set as well.  Great choice David!  This room is really coming together!


I posted the process of how I made this table on my other post.  You can find all those pictures here!  Thank you for stopping by!  I hope you all have a blessed week and enjoy this fall weather!

xo Jen


Linking up with:

Miss Mustard Seed


Thursday, October 2, 2014

ORC ~ My One Room Challenge!!

Hello everyone!  
Today marks the first week of the One Room Challenge Link Party!  I am so excited to jump in and be a part of it!  I have been wanting to change every a few rooms in my house, and just don't carve out the time.  So a six week challenge is exactly what I need!  One Room Challenge was started by Linda of Calling it Home, and I am so grateful that she thought of this!  Thank you Linda!  To follow along with tons of others, visit her blog!

So the way this whole thing works, is every week I will post an update of the progress I have made on my room!  And the final reveal will be in five short weeks!  Make sure to check back each week to see what I have done!

My One Room Challenge 

I chose my living room.  The living room is the first thing you see when you walk in the door, and I just really want it to reflect my style and taste.  It's not a bad room to start with, just not something I'm crazy about.

So here's the deal.. My husband loves this brick, but I'm not diggin it.  I never have.  I feel like everything I put on top of my mantle just competes with the brick.  I find it very busy.  I like a little more simple, lot's of creams and whites.. more details, but not busy.

Here are a few more before pictures of the room.  I also included my entry, which basically feels like it's part of the living room.  I'm going to include that in my challenge!  I hope I'm not setting myself up to fail! haha I think I can do this though!

Needed:
Woodwork surround on the fireplace
Custom Built Bookshelves to each side
Accessories
New wall paint
Fireplace stove repainted
New pillows
Something to be done with the ottoman
New clock idea

By the way, that wood square on the wall.. that's an unfinished project. ;)  I have a lot of those around my house.

This picture below.. it's not bad, but not great.  I feel like something more needs to be done with this space.  My ceiling is at it's peak on this wall, and leaves it feeling kind of bare.  If you have any ideas on how to make this a better focal point, but not too busy, please feel free to share!  I will definitely be doing something different with the pillows.  


Needed:

Different Pillows
Accessories
Something more to the wall space?

Picture below, I want to do something with a little more pop, and maybe some balance?  I'm also going to build two matching end tables to go on each side of this couch.  Add a new lamp, and accessories.. 

See that concrete foundation just above the carpet?  Well, that has been driving me crazy for years now!  It used to have carpet on it, but when we replace all our carpet, I said, nope.  I don't want carpet going up my wall! haha.  So I will be trimming that out to match the rest of the wood work, a creamy white paint of course. 

  Needed:

Two new custom built side tables
New Lamp
Accessories
Something more uniform on each side of the curtains

Here is my entry.  Not bad right?  But not what I want.  I have had this more contemporary console table for about eight years now.  Ready for a change.  I am going to build a new console table for this spot.  Something that more reflects my style.  I also would love to change this mirror up a bit.  I have a few ideas, but something to make it larger and give it more detail.  I hope it turns out like I'm seeing it in my head!!
 Needed:

New custom built entry table
Mirror built up for a larger look
Accessories
Maybe some woodwork on this wall? Not sure yet...

So now onto the plan!!  I have mentioned several times, "not my taste/style".  So what is my style?  Well, If I could have my perfect home, it would be a French Farmhouse with a Coastal Cottage flair!  Might sound like a lot of different looks, but it seems to work for me. :)

Here are a few inspiration pictures to give you an idea of where we are headed.  This part gets me really excited!!

I will be adding horizontal planking above the fireplace.  It's very cottage-farmhouse, and I'm in love with it!  I will also be building bookshelves to frame in the fireplace, so the backs will be planked as well.
Image Source
Image Source
Image Source 


Image Source
Above, I love the blue and white grain sack striping.  This pulls in a little bit of everything for me.  Farmhouse, old French grain sacks, and the blue and white are a coastal combination.  I may include this look using pillows, but not totally sure yet!

I love the look of old and new white pitchers.  So I will include some of these in my accessories.. I have a few already, though nothing like this collection below!
 
Image Source Not Found
I love this look below for my new entry table.  Something lighter, more rustic, and more shelf space.

Image Source


I could post inspiration pictures all day long, but I think this gives you an idea of where we're headed.  I look forward to starting this next week and sharing the progress with you all!  Any tips or ideas are welcome!  Thank you for stopping by! 

xo Jen

Linking up at: