Friday, December 22, 2017

Custom Built X-Brace Console Table

Good morning friends!  I hope you are staying warm as well as sane durning the hustle and bustle of this season.

Things have been pretty hectic around here as we are trying to move my mom into the cottage we've been building for her on our property.  I don't think we realized just how much work it would take for it all to come together!  But we are near the finish line, as a matter of fact, she's moving in today!  I will be putting together a post highlighting the process of building her cute little Modern Farmhouse Cottage.  Look for that in the near future!

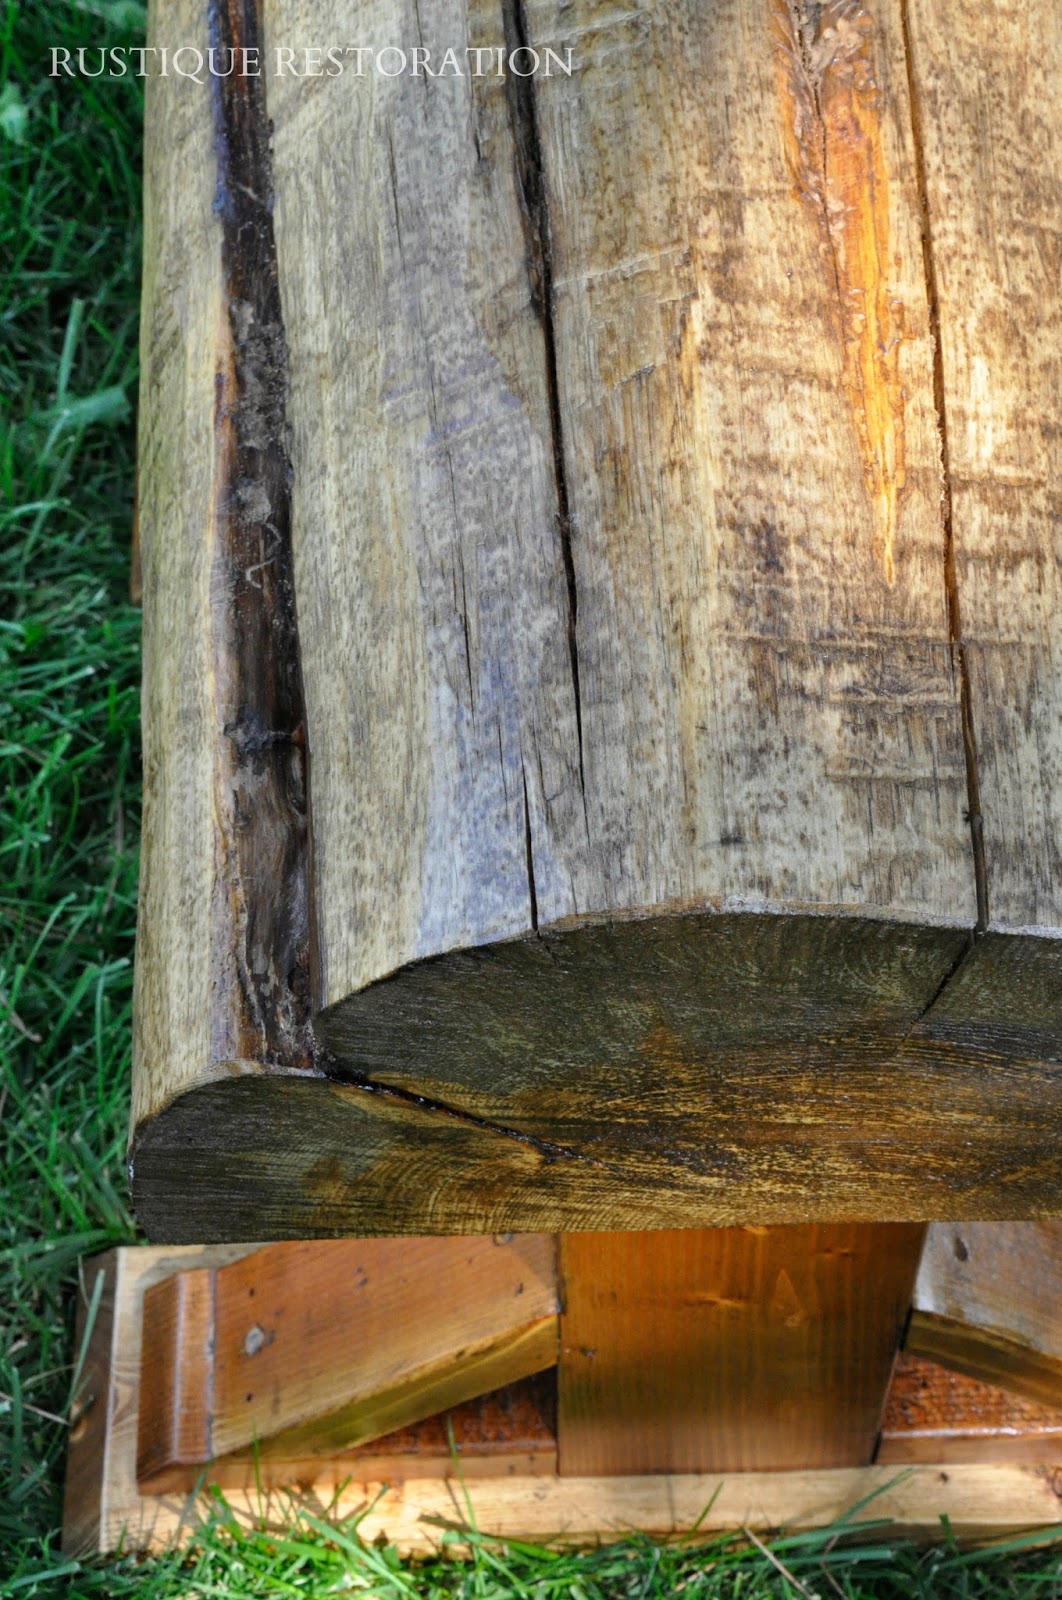
Today, I'm sharing some pictures of a custom console table I just finished and delivered yesterday!  My friend found a table she liked on Pinterest, and Rogue Engineer has detailed plans to work from, including a materials list, cut list, and lot's of pictures!  Thanks Rogue Engineer!  You can find the plans here!  I had to customize mine a bit to fit my clients needs.  So my top is 13"deep, verses the 16" the plan calls for.  I stained it in Ebony, and seal it with three coats of wipe on Polyurethane in satin.


The grains you see with pieces made out of fir and pine are seriously gorgeous!  Sometimes they can have a more simple look, and then you get some really wild sections thrown in there!  A dark stain will really bring all of that character out.


I scored a few weeks ago on this gorgeous floral arrangement from Pottery Barn!  It was part of their Fall Clearance!!  I love the mix of colors and texture in this arrangement.  Just thought I'd share! 


 While out shopping for a new sofa for Mom, I came across this adorable Ferris Wheel picture display.  Does this not remind you of Joanna Gaines's style from Fixer Upper?  I fell in love and my Mom bought it for me as an early Christmas present!  I still need to replace the cute little girl in frames with pictures of my own three cute little girls! :)


If you're interested in a custom built piece for your own home or office, contact me through my official website here!

Merry Christmas and Happy New Year to each of you!  

Thank you for stopping by!

xo Jen


Tuesday, September 19, 2017

Dream Farmhouse Living Room

I often let my imagination flow as I give way to my creative side, and my brain can feel like it's on overload!  There are so many unique elements that make up a home, from sleeping spaces, to a stylish yet practical kitchen, and then there is the living room.  That warm, cozy space where families gather together.  

I know for me personally, having a comfortable living room is important.  And at the same time, as someone who is artistic and design driven, I see my home as a fresh canvas awaiting a calming color palette, and rich with details that speak to me.  

To bring all of my ideas together, I decided to create a design board, using a collection of furniture and home decor items from Arhaus.  They have a huge selection of styles ranging from rustic to modern, and I had a pretty easy time finding pieces that would flow with the Clean Modern Farmhouse vibe I was going for. 


I started with selecting my sofa.  The sofa is most often the focal point in a living room, so I went with a nice neutral colored sectional and started to design around that.  The Lansbury Sectional in Gunsmoke was the perfect selection for me.  My second piece that I am head over heals for is their Rio Upholstered Chair in Lagoon!  Yes please!  Added to my wish list! 
After the two main seating items were picked out, I began to add several other rustic pieces I was drooling over.  Layering rugs, I added a gorgeous cow hide atop a hand knotted area rug in Grey and Ivory.  And I find the rustic cart coffee table super cool with the rusty metal wheels and natural distressed wood.

I'm a sucker for shiplap, like many others whom adore the classic farmhouse look.  Its a quick and pretty simple way to add farmhouse character to any house!  Check out a previous post here from my living room reveal to see how my husband and I added bookcases and shiplap to bring a farmhouse look to our ranch style house.


I love pairing a collection of vintage white pitchers I've picked up over the years.  Sea-glass green bottles, galvanized steel, and wicker baskets are also part of my dream living room!  And let's not ignore that rustic Antler Chandelier from Restoration Hardware.  I feel like that ties in perfectly with the cow hide rug.


My dream farmhouse living room would include natural wide planked oak hardwood floors, and creamy white paint and builtin cabinetry, beams, a stone/river rock fireplace.. all warm and inviting.  My walls would be dressed in large gorgeous farmhouse windows, allowing the sunlight to flood in.  I love creating environments that connect the indoor and outdoor living spaces together.


All of these pieces work beautifully together.  I have included a link to the numbered items on my board!  You can find the furniture I selected at Arhaus, along with many other options to create your own dream living room!  To view more living room inspiration, check out Arhaus Living Room and start planning your dream room today!


What would be on your top ten list when creating your own dream living room?  I would love to hear and see your ideas!  Don't want to miss out?  Enter your email and subscribe for all of the latest posts and ideas!

Thank you for stopping by. :)

xo Jen

13. Tin Lamp - Unknown
15. Basket - Unknown


SaveSaveSaveSaveSaveSaveSaveSaveSaveSaveSaveSave
SaveSaveSaveSave

Thursday, September 7, 2017

Restored Patio Table

Nice weather means Alfresco dining!  Today I'm sharing with you a fun little project that I took on for one of my clients.

The original table had a glass insert, and while she and her husband were moving it, the glass broke.  Such a bummer.  We bounced several ideas around.  My client wanted something durable, that wouldn't break, and would do well with the weather as well.  Some ideas were to do a tile insert, faux tile vinyl, or wood.  The tile was a no for a couple reasons.  One, it would be heavy, and two, the metal table was slightly flexible, so the grout would break.  The vinyl was a no simply because it would fade in the summer sunlight.  That left us with wood.

I chose a kiln dried redwood for the top.  It turned out so lovely!  

First I secured a piece of plywood to the bottom to allow a place to secure the wood planks.  Using glue and nails, I secured the outer frame of the top.  I chose to miter the corners.  I personally love this look.  Once the frame was built, I secured it to the table and plywood.


Next it was time to lay the planks down and secure.  I screwed the into place from the under side of the table top.  The center plank was run through the table saw and cut to size.  

Once everything was in place, I sanded the whole top, and then stained and sealed it.  The stain color I chose is one of my favorites from MinWax, called Provincial.  It's just a nice warm brown, and one of my main go-to stains.  


Now that everything was sealed, it was time to cut the hole for the umbrella.  Using the circular saw, we were able to cut the perfect hole!  I purchased a plain black plastic grommet to finish the hole off nicely.  And the table was finished!


I think the wood top was the perfect choice for this lakeside cabin!  

Have a great day!

xo Jen

Monday, September 4, 2017

Horse Saddle Barstools

Oh my goodness!  It has been way too long since I posted one of my projects!  I'm hoping to get back on track and share all of the awesome things going on in my life.  It's been a crazy but GREAT year, and I will be writing all about it soon.
Today, I'm sharing a custom project I just finished up for one of my clients.  They brought me two saddles that their now grown sons used when they were small boys.  The idea was to create bar stools for the saddles to rest on.  


I decided to use half round logs for the saddles to fit nicely over.  Then I created two pedestal style legs for each stool.  These stools are STURDY!  
I started by making a custom cut list, and then went ahead and cut all my pieces.  I decided to angle all of my edges for a nice transition from one piece to the other.  I love how it turned out!


These stools are so fun and will be a great way to display the saddles that made so many memories years ago.


I couldn't post these stools with out a little model to show you how they work.  Scarlett was perfect for the job!  Several times while I was in the process of building and finishing these, she had to test them out.  She would say, "Scarlett's turn!" "horsee".  


Well, as always, thank you for reading and come back soon for my next post!  I have a lot to share!

xo 
Jen


Friday, January 27, 2017

Vintage Table and Cane Back Chairs

Oh my, it's been awhile since I've posted!  I don't think I realized just how busy I would be with a new baby.  She is so much fun, and keeps me on my toes.  I literally jumped to my toes this morning when she dumped a glass of water on my head while I was still in bed!  Not really how I prefer to wake up and get out of bed, but hey.. I dried off!  Ha!

So today I'm sharing a project that I did awhile ago and just never posted.  its an old table that I thought had a lot of potential.  A beautiful double pedestal table with lots of curvy goodness! :)    


 I decided to pair it with vintage cane back chairs, which reupholstered in a pretty blue and white damask fabric.


Well, thank you for checking out my blog!  And thank you to all of you who have written me for advice or questions about my different posts and projects!  I love to connect with you.  Feel free to write anytime!  

Have a great day!

Jen